The Hex Editor Window (shown above) is the main method of viewing and editing binary files in 010 Editor (to edit text files see Using the Text Editor). A Hex Editor Window is displayed for each binary file that is loaded in the editor. Each file is displayed in a File Tab that displays a shortened form of the file name but the full file name can be viewed in the application title bar or in a hint popup displayed by placing the mouse cursor over the File Tab. The Hex Editor Window is divided into a left and a right area. By default, the left area displays the bytes of the file as a series of hexadecimal bytes and the right area displays the bytes as a series of characters (if a byte cannot be shown as a character a '.' will be displayed). At the far right of the editor by the scroll bar, the Mini Map displays the bytes of the file interpreted as a set of colors. To the left of the Hex Editor Window is a list of addresses. Each address indicates the file position of the first byte on the line. At the top of the window a Ruler indicates the byte offsets from the address on that line. The editor can be changed to display data in a number of different formats and to modify how the Hex Editor Window displays data see Using Edit As.
 |
The Caret/Cursor
A caret (also called a cursor) is displayed in the Hex Editor Window as a flashing line and the caret indicates the current position for inserting, deleting, or editing data. Move the caret with the mouse by clicking anywhere in the main display with the left mouse button. Alternately, the arrow keys can be used to move the caret (see Editor Keys below). When the editor is in Overwrite mode (see Editing Data below) the caret will be displayed as an underscore line and when the editor is in Insert mode the caret will be displayed as a vertical line. When the caret is in the left or right areas, the byte the caret is currently over will be highlighted gray in the other area. Switch between areas by pressing the Tab key. If the Hex Editor Window is not focused, the caret is drawn partially transparent and this is called the inactive caret. Use the Editor Options dialog to control the style and shape of the caret and use the Theme/Color Options dialog to set the color of the caret and inactive caret.
 |
Editing Data
To edit data in the editor, position the caret over the byte to edit. When the caret is in the left area (hexadecimal data) enter a valid hexadecimal digit (0 to 9 or A to F) to edit the data. When the caret is in the right area (character data) enter any character to edit the data.
The result of editing depends on whether the editor is in Insert or Overwrite mode. In Overwrite mode (OVR appears in the Status Bar) the characters typed will replace any existing characters. In Insert mode (INS appears in the Status Bar) a new byte will be inserted in the file (NOTE: when editing hexadecimal data, a byte is inserted only when the caret is over the first digit in the hexadecimal byte). The current Insert/Overwrite mode is stored separately for text and hex files and the current mode can be changing using the Insert Key (see Editor Keys below) or by clicking INS/OVR in the status bar. Pressing the Delete key will delete the current byte from the file.
When any edits are made to the file, a '*' character will appear in the title bar to indicate that the file has been modified. If bytes have been inserted, a '*' character will appear by the file size in the Status Bar. The 'Edit > Undo' and 'Edit > Redo' menu options can be used to undo or redo any changes made to the file. The file can also be edited using the clipboard (see Using the Clipboard for more information).
Editor Keys
The following keys are available when editing the file:
- Left, Right, Up, Down - move the caret in any direction.
- Ctrl+Left, Ctrl+Right - move the caret to the next or last group of bytes.
- Ctrl+Up, Ctrl+Down - scroll the editor up or down without moving the caret.
- Home - move the caret to the first byte on a line.
- End - move the caret to the last byte on a line.
- Ctrl+Home - move the caret to the first byte in the file.
- Ctrl+End - move the caret to the end of the file.
- Insert - toggle Insert and Overwrite mode.
- Delete - deletes the current byte from the file.
- Tab - switches between the left and right editing areas.
- Alt+Up - moves to the previous sector in a hard drive.
- Alt+Down - moves to the next sector in a hard drive.
The editor keys can be customized using the Shortcut Options dialog.
Mini Map

A diagram is displayed on the right side of the editor which shows the bytes of the file mapped to colors. This diagram is discussed in the separate Mini Map help topic.
Right-Click Menu
A menu of editing options can be accessed by right-clicking on the Hex Editor Window. This menu is sub-set of the Edit Menu (see the Edit Menu for an explanation of each menu option). The Right-Click menu can also be used to set the current selection and see Selecting Bytes for more information. Templates can be run as regular or at an offset by clicking Run Template... or Run Template at Offset... and see Running Templates and Scripts for more information. Once Find or Compare has been performed on a file, the menu options Clear Find Results or Clear Compare Results appear and can be used to clear the Output tables. The Right-Click Menu can be customized by right-clicking the editor and selecting the Customize... menu option (see the Menu Options dialog for more information). Right-click on the address column to see a menu to control addresses or right-click on the ruler to see a menu to control the ruler and layout of each line.
Swapping Bytes

010 Editor has the ability to visually swap bytes of data in the Hex Editor without modifying the underlying data (for example, compare the image above with the image at the top of this page). Data can be swapped in groups of 2 bytes, 4 bytes, 8 bytes, etc. and the number of bytes is controlled using the 'View > Group By' menu. To swap data, choose a byte grouping in the 'View > Group By' other than Byte and then enable the 'View > Group By > Swap Little-Endian Bytes by Group' option. Note that swapping is only performed when the current file is in Little Endian mode and when swapping is enabled 'LIT<>' will appear in the status bar. When bytes are swapped in the Hex Editor, the selection behaves differently because 010 Editor only supports selecting a contiguous range of bytes. Therefore, the selection may sometimes appear disjointed because of which bytes are selected. Hold down the Ctrl key when selecting using the keyboard to ensure that a full group is selected. To swap the bytes in the actual data file, see the Hex Operations dialog.
 |
Splitting the Hex Editor Window

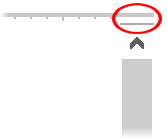
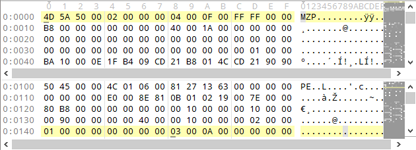
The Hex Editor Window can be split into two different regions by clicking the small button above the horizontal scroll bar (see the diagram above) and dragging the mouse down. After releasing the mouse, the window will be split into a top and a bottom area (see the diagram below). This feature is useful if you are editing two different areas of the file at the same time. Press the Tab or Shift-Tab keys to move the caret between the different areas. Move the mouse over the line separating the areas and click and drag the line up or down to resize the areas (the mouse cursor should change to an up-down arrow). Double-click on the separating line to remove the separator and return to having just one area. The Hex Editor Window can also be split or un-split by clicking the 'Window > Split Window' menu option.

Custom Starting Address

Usually the first byte in a binary file is located at address zero but a custom starting address can be assigned to a file by clicking 'View > Addresses > Set Starting Address'. Enter an address in the dialog as displayed above and click Decimal to enter the address in decimal notation or Hex to enter the address in hexadecimal notation. The first byte in the file will now have the given address and the application will use this addressing for Find, Goto, the Status Bar, the Template Results, etc. The starting address can also be changed by right-clicking on the address column in the Hex Editor and selecting 'Addresses > Set Starting Address'. When a non-zero starting address is chosen, OFFSET appears in the Status Bar. Clicking on OFFSET shows a popup menu which can be used to change the offset or clear the offset (set the offset back to zero). Custom starting addresses are stored with the current workspace.
A custom starting address can also be set with the Command Line or with the GetStartingAddress/SetStartingAddress functions in a script. Note that when writing a script or template, functions still access the first byte of the file as address zero and see Local Coordinates for more information.
When importing an Intel Hex or Motorola S-Record file that contains a blank area at the beginning of the file, a custom starting address will automatically be set for the file at the first byte that contains data. To turn off this functionality use the Importing Options dialog.
Template Results
After a Binary Template has been run on the current file, the results will be displayed in the Template Results panel at the bottom of the Hex Editor Window. This panel is sometimes hidden and can be shown by clicking the small button below the horizontal scroll bar and dragging upwards. See Working with Template Results for more information on using the Template Results panel.

Placing the mouse cursor over bytes in the hex editor that correspond to a variable in a Template will show those hex bytes as highlighted. A hint popup will also show more information about the variable. If the variable is a member of a struct then the whole struct will be shown with an outline and this is called struct outlining. See Struct Outlining for more information.
Column Mode
Hex data can also be edited using a special Column Mode where columns of bytes can be selected. One way to create a column selection is to hold down the Ctrl key while dragging the mouse. See the separate Column Mode help topic for more information.
Middle-Click Scrolling
The middle-mouse button on a computer mouse can be used to scroll the hex editor as described in the Middle-Click Scrolling section of the Text Editor.
Reloading Changes
When the editor detects that an open file has been modified by an external process, a dialog is displayed asking to reload the file. See the Reloading Changes section of the Text Editor for more information.
Editor Options
See the Editor Options and Hex Editor Options dialogs for a list of options that can be controlled for the Hex Editor Window.
| 


